

Credit: This page was inspired by a Twitter post by the user ℳisterℳagoo.
At first, it might seem unintuitive, or perhaps a little odd, to think of declaring a [Parameter] property of type RenderFragment<RenderFragment>.
[Parameter]
public RenderFragment
The fact is, if you have ever created a Custom Blazor layout then you are already familiar with a similar concept.
The <T> in RenderFragment<T> is passed into the user-specified mark-up as the @context variable.
A layout uses the name @Body rather than @context, but @Body is actually a RenderFragment.
To prove this point, edit the /Shared/MainLayout.razor file and change @Body to the following.
@Body.GetType().Name
Now instead of displaying the content rendered by @Body, we will see the class name, which happens to be RenderFragment.
Although this is not exactly how a Blazor layout works, it is a useful comparison for helping to understand the principle
behind declaring a [Parameter] property of type RenderFragment<RenderFragment>.
<div class="our-main-layout">
  @Body
</div>
In the preceding fictitious layout, we can imagine the entire mark-up as being the ChildContent RenderFragment of some parent component,
and the @Body on line 3 as the equivalent of a @context (named Body)
that is a RenderFragment that we can choose to inject anywhere we wish.
In this case, we are choosing to inject the Body inside an HTML <div> element.
The equivalent of our own would be either
<OurComponent>
  <p>
    @context
  </p>
</OurComponent>
Or, if we want to use the name Body (or anything else) instead of context, we can specify the name to use for the context. See the Avoiding @context name conflicts section at the bottom of Passing data to a RenderFragment.
<OurComponent Context="FragmentWeNeedToRender">
  <div class="our-wrapped-fragment">
    @FragmentWeNeedToRender
  </div>
</OurComponent>
Creating a working example
First, create a class we can use to bind some data to.
public class Person
{
  public string Salutation { get; set; }
  public string GivenName { get; set; }
  public string FamilyName { get; set; }
}
Creating a simple templated repeating component
This detail is similar to that covered in the section Using @typeparam to create generic components. Here we'll quickly gloss over the shared content so, if you've not read that already, please read it first.
Next, we need to create a new component in /Shared named DataList.razor.
This component will be a generic component (using @typeparam) and will take an IEnumerable<TItem> and iterate over
the enumerable to render content per item using a template specified by its consumer.
@typeparam TItem
<ul>
  @foreach (TItem item in Data ?? Array.Empty<TItem>())
  {
    @ItemTemplate(item)
  }
</ul>
@code
{
  [Parameter]
  public IEnumerable<TItem> Data { get; set; }

  [Parameter]
  public RenderFragment<TItem> ItemTemplate { get; set; }
}
This component may be consumed by our Index page like so:
@page "/"

<DataList Data=@People>
  <ItemTemplate>
    <li @key=context>@context.Salutation @context.GivenName @context.FamilyName</li>
  </ItemTemplate>
</DataList>

@code
{
  private IEnumerable<Person> People;
  protected override void OnInitialized()
  {
    base.OnInitialized();
    People = new Person[]
    {
      new Person { Salutation = "Mr", GivenName = "Bob", FamilyName = "Geldof" },
      new Person { Salutation = "Mrs", GivenName = "Angela", FamilyName = "Rippon" },
      new Person { Salutation = "Mr", GivenName = "Freddie", FamilyName = "Mercury" }
    };
  }
}
Note: The @key=context in the <li> element is for performance purposes and should be used whenever rendering a list.
See Optimising using @key for more information.
The problem
What if our DataList component doesn't only output a list of items. Perhaps it has a footer that allows the user to show a page of elements at a time with Previous / Next buttons, and a footer showing how many items there are in total?
We can simply add this additional mark-up to our DataList component,
but what if the consumer of our component wants to also render the list differently?
Perhaps they need to display the paged list as an HTML <table> in once place, and an HTML <ul> somewhere else?
<div class="paged-data-list">
  <div class="paged-data-list_header">
    @Data.Count() item(s)
  </div>
  <div class="paged-data-list_body">
    <!-- Consumer wants either a <table> or a <ul> here -->
    @foreach(TItem item in CurrentPageOfData)
    {
      @ItemTemplate(item)
    }
    <!-- Consumer wants either a </table> or a </ul> here -->
  </div>
  <div class="paged-data-list_footer">
    <button type="button" etc>Prev</button>
    <button type="button" etc>Next</button>
  </div>
</div>
This is exactly the kind of use-case that requires us to have the user pass in a RenderFragment<RenderFragment>.
Rendering a RenderFragment within a RenderFragment
Now that we have our ItemTemplate that receives an @context of type Person in order to render each element,
we need to allow our component's consumer to specify what content to include
before the first element and after the last element -
as highlighted in the preceding code sample on lines 6 and 11.
The consuming component would look something like either of the two following examples
<DataList Data=@People>
   <ItemTemplate Context="person">
    <li @key=person>
      @person.Salutation @person.FamilyName, @person.GivenName
    </li>
  </ItemTeplate>
</DataList>

<DataList Data=@People>
  <ListTemplate Context="allPeople">
    <ul Type="A">
      @allPeople
    </ul>
  </ListTemplate>
  <ItemTemplate Context="person">
    <li @key=person>
      @person.Salutation @person.FamilyName, @person.GivenName
    </li>
  </ItemTemplate>
</DataList>
- Line 2
Defines the template to use for the list. In this case, we wrap our inner content (our data items "allPeople") with<ul>and</ul>. - Line 4
Indicates where to render the items mark-up by executing theRenderFragmentpassed via the context variable that we have chosen to refer to as "allPeople". - Line 7
Specifies a template for each item. In this case, the context will be an instance ofPersonand so we've chosen to refer to the context by the name "person" by specifyingContext="person".
Passing rendered content as a placeholder for the consumer to display
The DataList component needs to render each item in the Data property,
and then pass that to the consumer to decide where in its ListTemplate to render that output.
Or, more accurately, the DataList needs to pass a RenderFragment that will render the mark-up for the items when executed.
First, we'll add the ListTemplate property to our DataList component.
[Parameter]
public RenderFragment<RenderFragment> ListTemplate { get; set; }
Next we'll change our DataList so that it uses <ul> and <li> as a default when no ListTemplate has been specified
by the consumer, after that we'll deal with the scenario where the consumer does want to use a custom ListTemplate.
Rendering using a default list template
This is the easy part. All we need to do is to write our mark-up as if there were no such thing as a ListTemplate on
the component, just as we normally would - but only if the ListTemplate property is null.
@typeparam TItem
@if (ListTemplate == null)
{
  <ul>
    @foreach (TItem item in Data ?? Array.Empty<TItem>())
    {
      @ItemTemplate(item)
    }
  </ul>
}

@code
{
  [Parameter]
  public IEnumerable<TItem> Data { get; set; }

  [Parameter]
  public RenderFragment<TItem> ItemTemplate { get; set; }

  [Parameter]
  public RenderFragment<RenderFragment> ListTemplate { get; set; }
}
- Lines 2
Checks if ListTemplate is null - Lines 4-9
If ListTemplate is null then we render a standard<ul>list, and then render element in Data using the ItemTemplate.
Rendering with a custom ListTemplate
The RenderFragment<TItem> expects us to pass an instance of TItem each time we render it.
This is simple to do because we have an IEnumerable<TItem> from which we can pull values to be rendered,
but what do we do when we need to pass an instance of RenderFragment to our template?
To define a non-generic RenderFragment we can use the standard Razor escape sequence to denote HTML, which is @:
RenderFragment rf = @<h1>Hello</h1>
To define a RenderFragment<T> we need to use a lambda that passes in an instance of T
RenderFragment<Person> rf =
  person => @<h1>Hello @person.Name</h1>;
So how would we return a RenderFragment that will loop over the items in our Data property only when it is rendered?
For that, we need to use the wig-pig syntax.
The wig-pig

The wig-pig is a set of characters that the Razor rendering engine can use to denote a chunk of Razor mark-up within C# files.
For obvious reasons, this character sequence only works in .razor files.
Any visual likeness to any person, either living or dead, is purely coincidental.
Note: @:@{ is in fact two character sequences.
First @: tells the Razor parser to treat the following text as Razor mark-up,
and then @{ is the start of a C# code block - which will obviously end somewhere with a complementary }.
Ultimately this gives us a chunk of Razor mark-up,
which is equivalent to a RenderFragment with C# code inside it that can perform operations such as loops.
When calling @ListItem(...) in our Razor file we can pass an in-place RenderFragment
as the parameter using the wig-pig syntax.
@ListTemplate(
  @:@{
    foreach (TItem item in Data ?? Array.Empty<TItem>())
    {
      @item.ToString()
    }
  }
)
Using this syntax, we render the mark-up specified by the consumer in <ListTemplate> passing in a RenderFragment that
will render all of the elements in Data.
In the preceding code it simply calls ToString() on each item in Data.
However, ideally we would like to use the ItemTemplate the consumer has provided for us.
@ListTemplate(
  @:@{
    foreach (TItem item in Data ?? Array.Empty<TItem>())
    {
      @ItemTemplate(item)
    }
  }
)
DataList.razor
@typeparam TItem
@if (ListTemplate == null)
{
  <ul>
    @foreach (TItem item in Data ?? Array.Empty<TItem>())
    {
      @ItemTemplate(item)
    }
  </ul>
}
else
{
  @ListTemplate(
    @:@{
      foreach (TItem item in Data ?? Array.Empty<TItem>())
      {
        @ItemTemplate(item)
      }
    }
  )
}

@code
{
  [Parameter]
  public IEnumerable<TItem> Data { get; set; }

  [Parameter]
  public RenderFragment<TItem> ItemTemplate { get; set; }

  [Parameter]
  public RenderFragment<RenderFragment> ListTemplate { get; set; }
}
Consuming our DataList
Sample 1: A simple list
<DataList Data=@People>
  <ItemTemplate>
    <li @key=context>@context.Salutation @context.GivenName @context.FamilyName</li>
  </ItemTemplate>
</DataList>
Generates the following
<ul>
    <li>Mr Bob Geldof</li>
    <li>Mrs Angela Rippon</li>
    <li>Mr Freddie Mercury</li>
</ul>
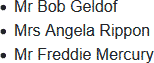
Rendered HTML
Sample 2: An HTML table
<DataList Data=@People>
  <ListTemplate Context="listOfPeople">
    <table border=1 cellpadding=4>
      <thead>
        <tr>
          <th>Salutation</th>
          <th>Given name</th>
          <th>Family name</th>
        </tr>
      </thead>
      <tbody>
        @listOfPeople
      </tbody>
    </table>
  </ListTemplate>
  <ItemTemplate Context="person">
    <tr @key=@person>
      <td>@person.Salutation</td>
      <td>@person.GivenName</td>
      <td>@person.FamilyName</td>
    </tr>
  </ItemTemplate>
</DataList>
Generates the following
<table cellpadding="4" border="1">
  <thead>
    <tr>
      <th>Salutation</th>
      <th>Given name</th>
      <th>Family name</th>
    </tr>
  </thead>
  <tbody>
    <tr>
      <td>Mr</td>
      <td>Bob</td>
      <td>Geldof</td>
    </tr>
    <tr>
      <td>Mrs</td>
      <td>Angela</td>
      <td>Rippon</td>
    </tr>
    <tr>
      <td>Mr</td>
      <td>Freddie</td>
      <td>Mercury</td>
    </tr>
  </tbody>
</table>
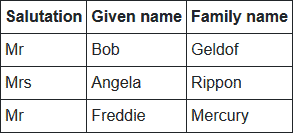
Rendered HTML
Assigning defaults when RenderFragments are not specified
At the moment we are having to check if ListTemplate is null using an @if statement in our view,
and we aren't even checking if ItemTemplate is set or not. Neither of these approaches are ideal.
Instead, we should set our RenderFragment properties to a desired default if they have not been set by the consumer.
This way our component's render logic can be kept much simpler.
@ListTemplate(
  @:@{
    foreach(TItem item in CurrentPage)
    {
      @ItemTemplate(item)
    }
  }
)
Override OnParametersSet() in our component and ensure the ItemTemplate property is not null.
To do this, we create a lambda that receives a TItem and returns a RenderFragment (using the wig-pig syntax).
  protected override void OnParametersSet()
  {
    if (ItemTemplate == null)
    {
      ItemTemplate = (item) => @:@{
      <li @key=item>@item.ToString()</li>}
      ;
    }
}
To ensure the ListTemplate is not null we create a lambda that receives a RenderFragment and then ignores it and returns
our custom wig-pig RenderFragment instead.
    if (ListTemplate == null)
    {
      ListTemplate = \_ => @:@{
      <ul>
        @foreach(TItem item in CurrentPage)
        {
          @ItemTemplate(item)
        }
      </ul>
      }
    ;
    }
Note: The ; cannot be on the same line as the preceding }, otherwise the Razor parser does not parse the source correctly.
This has been reported as a bug
and will hopefully be fixed in the near future.
Summary
The RenderFragment<RenderFragment> technique should be used when the consumer wishes to identify a place-holder in their
mark-up for content that will be passed to them during render - such as the Body placeholder in a Blazor Layout.
Hopefully, this section has helped you to understand when to use this technique, and how to use the wig-pig @:@{
syntax to generate in-place RenderFragments.
Additional reading
The source code for this section includes an additional sample page that consumes a PagedDataList component.